Decorating wine bottles has become a popular trend in recent years, as it allows individuals to repurpose empty bottles and transform them into beautiful pieces of art. With endless possibilities for creativity, incorporating various materials and techniques, anyone can turn ordinary wine bottles into decorative items for their home, gifts for friends and family, or even centerpieces for events.
There are numerous methods and supplies that can be used to decorate wine bottles, such as paints, glitters, and string lights, offering a wide range of choices for personalizing each piece. No matter the chosen style or intended purpose, it is essential to first empty and clean each wine bottle before beginning the decorating process. Once prepared, the wine bottles can serve as a canvas for artistic expression and personal flair.
This article will explore various ways to decorate wine bottles, presenting diverse ideas and techniques that cater to different tastes and levels of expertise. Providing inspiration and guidance for those looking to delve into the world of wine bottle crafts, readers will learn how to create stunning works of art that can be proudly displayed in their homes or shared as unique gifts.
Decorate Wine Bottles – The Basics
Decorating wine bottles is a fun and creative way to upcycle and transform used bottles into beautiful pieces of art or functional items for the home. Before diving into a do-it-yourself (DIY) wine bottle project, it’s essential to understand the basics of preparing and decorating wine bottles.
First, it’s crucial to clean the wine bottles thoroughly. Soak the bottles in warm, soapy water to loosen the labels and any adhesive residue. Gently scrape off the labels, and if necessary, use an adhesive remover. Make sure the bottles are clean and dry before proceeding with any decorations.
Selecting the appropriate paint for wine bottle projects is also important. One popular option is using acrylic paint, which adheres well to glass surfaces and dries quickly. For a high-gloss or metallic look, consider using enamel paint. Before painting, wipe the surface of the bottle with rubbing alcohol to remove any grease or fingerprints, ensuring better paint adhesion.
There are countless creative ways to decorate wine bottles, such as:
- Spray painting: Create an ombre effect by using multiple shades of the same color or contrasting colors and blending them together with a spray paint technique.
- Decoupage: Use paper, fabric, or collage material to cover the wine bottle’s surface. Seal the design with decoupage glue or clear varnish to protect and give the bottle a glossy finish.
- Yarn or twine wrapping: Wrap the bottle with yarn, twine, or string to create a textured, cozy appearance.
- Stenciling or hand-painting designs: Draw or stencil intricate patterns or images onto the bottle with paint, enhancing the overall appearance.
In summary, with proper cleaning and paint selection, wine bottles can be upcycled into beautiful and functional pieces using creative and unique decorating techniques. Engaging in DIY wine bottle projects is not only enjoyable but also helps promote sustainability and resourcefulness.
Decorate Wine Bottles – Decorative Techniques
Painting Techniques
One popular way to decorate wine bottles is by using various painting techniques, which can help transform a simple glass bottle into a custom, eye-catching piece. A few common painting methods include using acrylic paints, chalkboard paint and spray paint. Additionally, stencils can be used to create intricate or uniform designs on the bottles. To achieve a more unique appearance, you can also try the marbling technique by mixing different colors of paint.
Decoupage Techniques
Another option for decorating wine bottles is through decoupage, which involves adhering decorative paper or fabric to the glass surface with a clear-drying adhesive. This technique can help you achieve intricate designs with ease. To decoupage a wine bottle, start by cutting out your chosen images or patterns and applying a layer of adhesive (like Mod Podge) to both the bottle and the cutouts. Once dry, follow up with another coat of adhesive to seal and protect the design.
Glass Drilling Techniques
To create more functional decorations, such as hanging vases or candleholders, you can use a drill to create holes in the wine bottles. This process involves using a diamond or carbide-tipped drill bit specifically designed for glass. To prevent the bottle from cracking or shattering, it’s important to apply gentle pressure and keep the drill area lubricated with water. Once the hole is created, smooth the edges using fine-grit sandpaper.
Adhesive Layering Techniques
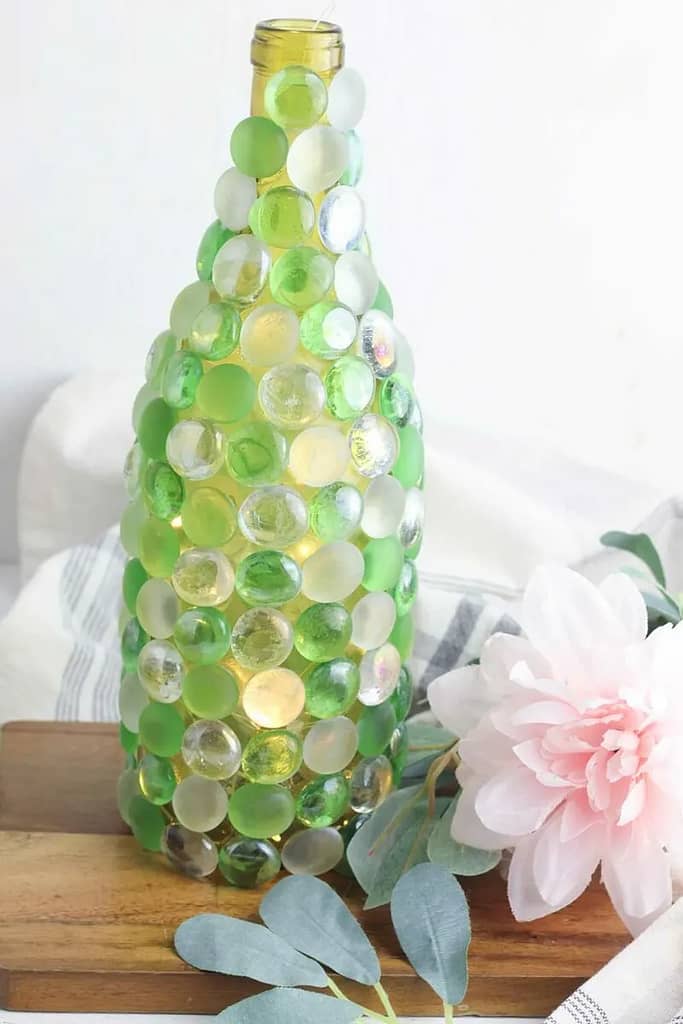
Various adhesive layering methods can help enhance the visual appeal of decorated wine bottles. For instance, by using hot glue or double-sided tape, you can easily attach embellishments such as beads, crystals, or charms. Combining these adhesive techniques with other materials like twine, glitter, and lace can offer elegant touches to wine bottle decorations. Experiment with layering options to achieve your desired look, and don’t be afraid to mix and match your choice of adhesives and embellishments.

Crafting with Wine Bottles
Wine bottles can be easily repurposed into beautiful and functional home decor items. In this section, we’ll discuss how to create wine bottle vases, lamps, and candles using simple DIY techniques and supplies.
Making Wine Bottle Vases
Transforming wine bottles into vases can add a unique touch to your home decor. Start by cleaning and removing the labels from the bottles. Choose a paint color (acrylic or spray paint) that matches your home’s color scheme and apply it evenly to the bottles. After the paint has dried, you can wrap the necks with ribbon or jute for added visual interest. Fill the vases with water and add your favorite flowers to create a beautiful centerpiece or decoration.
Creating Wine Bottle Lamps
Wine bottle lamps are an innovative way to add lighting to any room. To create a wine bottle lamp, first, clean the bottle and remove the label. Drill a hole near the bottom of the bottle for the cord to pass through, and use sandpaper to smooth the edges. Next, insert a lamp kit through the hole, attach the lampshade, and secure the socket on the neck of the bottle. Plug in your new wine bottle lamp, and enjoy the warm glow it provides.
Crafting Wine Bottle Candles
Wine bottle candles make for elegant and eco-friendly decorations. Begin by cutting a wine bottle, leaving the top part for the candle. Sand the cut edges to make them smooth and safe to handle. Select a suitable wax (e.g., soy or beeswax) and wick the material, then melt the wax in a double boiler. Using a thermometer, monitor the temperature and remove the wax when it reaches the recommended pouring temperature. Attach the wick to the bottom of the bottle top by dipping its metal base into the melted wax, then pour the wax into the wine bottle slowly and steadily. Allow the wax to cool and harden, trim the wick to the desired length, and your wine bottle candle is ready to use.
By repurposing wine bottles into vases, lamps, and candles, you can not only reduce waste but also enhance your home decor with personalized and handmade items. Enjoy the process of creating your unique wine bottle crafts and give a new life to those empty bottles.

Festive Wine Bottle Decorations
Christmas Wine Bottle Crafts
Transform your used wine bottles into beautiful Christmas decorations by following these easy and creative ideas. One popular option is to create Glitter Holiday Message Bottles by applying glue on the bottles and rolling them in glitter. Add a festive message or design with a paint pen for a personal touch. You can also design Grinchy Bottles by painting the bottles green and drawing the Grinch’s face on them.
Wine Bottle Christmas Tree is another unique idea, in which you can arrange wine bottles in tiers to create a tree shape, adding lights and ornaments to enhance the festive appearance. For a more subtle decoration, opt for Twined and Painted Bottles by wrapping twine or ribbon around the bottles and painting them in holiday colors.

Halloween Wine Bottle Crafts
To create spooky Halloween wine bottle decorations, consider these fun ideas. Halloween Bottle Candles are an easy option; simply insert tall black or orange taper candles into the bottlenecks and let the wax drip down the sides, creating a haunting effect.
Another idea is to make Dry Bottle Decorations by coating the wine bottles in glue and wrapping them with gauze or cheesecloth to create a mummy effect. Add googly eyes or paint the details for the perfect spooky touch. You can also create Halloween-themed characters like witches, ghosts, or pumpkins by painting the wine bottles and adding additional craft materials like hats and facial features.
These festive wine bottle decorations are not only fun to create, but they also upcycle bottles that might have otherwise been discarded, making them an eco-friendly choice for holiday celebrations.
Creating Unique Designs
Decorating wine bottles can be an enjoyable and creative way to repurpose old bottles, turning them into unique pieces of art. There are numerous design ideas to explore, combining various materials and techniques to create distinctive patterns.
One popular material to use when decorating wine bottles is twine. Wrapping twine around the bottle can give it a rustic, cozy feel. You can either cover the entire bottle or create specific patterns by wrapping the twine around certain sections. Additionally, attaching decorative, embellishments like beads or small charms to the twine can further enhance the design.
Glitter is another fantastic option for adding some sparkle to your wine bottle crafts. You can create various shapes and patterns on the bottle using glue or adhesive tape, and then sprinkle glitter over the adhesive to create a dazzling design. Choose from a wide range of glitter colors to create unique combinations or even use multiple colors in a single design.
Integrating various shapes and sizes in your wine bottle designs is possible through the use of stencils or freehand painting. Painted patterns such as geometric designs, swirls, or nature-inspired shapes can transform the bottles into striking pieces of art. Make sure to use acrylic paint, which adheres well to glass surfaces.
Rhinestones, gems, and embellishments can also be incorporated into your wine bottle designs to create eye-catching and elegant pieces. You can either glue individual rhinestones and gems directly onto the bottle or arrange them in complementary patterns for added flair.
In conclusion, there are endless design possibilities when it comes to decorating wine bottles. By using materials such as twine, glitter, paint, and embellishments, you can create unique and artistic designs, suitable for any style or occasion.
Turning Wine Bottles Into Functional Items
Creating Wine Bottle Planters
One way to upcycle wine bottles is by turning them into planters. First, cut the wine bottle in half, sand the edges to ensure safety, and create drainage holes at the bottom. Then, place a small layer of gravel or pebbles to help with drainage, followed by soil and the plant of your choice. Wine bottle planters are perfect for growing herbs or small plants and can be a stylish addition to any indoor or outdoor space.
Making Wine Bottle Soap Dispensers
Another practical use for empty wine bottles is to transform them into soap dispensers. To do this, simply clean the bottle, remove the label, and attach a dispenser pump to the opening of the bottle. You can fill the bottle with dish soap, hand soap, or any other liquid you’d like to dispense. A wine bottle soap dispenser can add a unique touch to your kitchen or bathroom décor while helping reduce plastic waste from disposable soap bottles.
Creating Wine Bottle Bird Feeders
Repurposing wine bottles into bird feeders is a fantastic way to not only upcycle but also support local wildlife in your backyard. To create a wine bottle bird feeder, clean the bottle and remove the label. Next, attach a small plate or saucer to the bottom of the bottle to act as a feeding platform for birds. Secure the wine bottle to a wall, fence, or post in your garden, making sure that it is safely held in place. Fill the bottle with birdseed, and watch as birds come and enjoy their new feeder.

Crafting Wine Bottle Tiki Torches
Wine bottle tiki torches are perfect for creating a cozy and inviting outdoor ambiance, while also repurposing empty bottles. To craft a wine bottle tiki torch, clean the bottle and remove any labels. Fill the bottle with citronella oil or other torch fuel, leaving about an inch of space at the top. Insert a cotton or fiberglass wick into the bottle, ensuring it reaches the bottom and extends a few inches above the opening of the bottle. Secure the wick in place with a metal coupling or a custom-designed torch holder. Light the wick and enjoy the glow of your new wine bottle tiki torch.
By following these ideas, you can turn empty wine bottles into functional and beautiful items for your home and garden. Doing so is not only environmentally friendly, but it also allows you to personalize your space with creative and unique touches.
Special Techniques and Considerations
Slumping Wine Bottles
Slumping is a process used to transform wine bottles by heating them in a specialized oven called a kiln. This technique enables DIY enthusiasts to create unique items such as serving trays, wall art, and other decorative pieces. Before starting the slumping process, clean the wine bottle thoroughly, both inside and out. Remove any labels and use sandpaper to smooth out any rough edges.
When preparing for slumping, it’s crucial to take certain safety precautions, such as using heat-resistant gloves and protective eyewear. Carefully place the wine bottle in the kiln on a suitable mold, ensuring that the kiln is well-ventilated. The temperature and duration of heating will vary depending on the specific project. Typically, the kiln is heated to around 1400°F (760°C) and held for 10-20 minutes. After the desired shape is achieved, allow the bottle to cool gradually to room temperature before removing it from the kiln. This cooling process, known as “curing,” is essential to prevent the glass from cracking.
Etching Wine Bottles
Etching wine bottles is another exciting technique that allows for the creation of customized designs and patterns on the glass surface. There are various ways to etch wine bottles, but using a glass etching cream is a popular and accessible method. Before starting, gather your materials, such as a stencil, paintbrush, and protective gloves. It’s essential to follow the tutorial and manufacturer’s instructions on the cream’s usage to ensure the best results.
To begin, prepare the wine bottle by cleaning it thoroughly and drying it completely. Position the stencil onto the desired area of the bottle, ensuring it is firmly in place. Wearing protective gloves, apply the etching cream to the stencil area with a paintbrush, taking care to cover the entire design evenly. Allow the etching cream to sit on the bottle for the necessary amount of time as per the manufacturer’s instructions, typically between 5-15 minutes.
After the required time has passed, rinse off the etching cream under running water. Make sure to wear gloves during this step to avoid skin irritation. Once the etching cream is entirely removed, carefully peel off the stencil to reveal the newly etched design. Dry the wine bottle and enjoy your work of art. Remember to keep etched wine bottles out of direct sunlight, as the etched area may be sensitive to color fading.
Decorate Wine Bottles FAQs
How to create elegant wine bottle centerpieces?
To create elegant wine bottle centerpieces, start by removing any labels and cleaning the bottles thoroughly. Next, choose a theme or color scheme and gather your materials, such as paint, ribbons, lace, or beads. You can also opt for wine bottles of different heights and shapes to add visual interest. Once you’ve selected your materials, apply them to the bottles: paint the bottles, wrap them with ribbon or twine, or attach decorative elements such as rhinestones or pearls. Arrange the decorated bottles on your table, and consider adding flowers, candles, or fairy lights for added ambiance.
What materials can be used to embellish wine bottles?
Numerous materials can be used to embellish wine bottles, including paint, twine, ribbons, lace, beads, rhinestones, and pearls. Additionally, you can use materials like burlap, washi tape, or fabric scraps for a unique look. To adhere materials to your wine bottles, you can use craft glue, hot glue, or double-sided tape.
What are some eco-friendly ways to upcycle wine bottles?
Eco-friendly ways to upcycle wine bottles include turning them into self-watering planters, bird feeders, or tiki torches. You can also use wine bottles as storage containers for pantry items or as vases for fresh or dried flowers. Converting wine bottles into hanging lights or candle holders is another eco-friendly way to reuse them.
How can I personalize wine bottles for gifting?
To personalize wine bottles for gifting, you can paint or etch the recipient’s name or initials on the bottle. Alternatively, you can attach a custom label, include a personal message, or wrap the bottle in the recipient’s favorite color or pattern. You may also consider creating a themed decoration that reflects the recipient’s interests or hobbies.
What are some simple DIY methods for wine bottle decoration?
Simple DIY methods for wine bottle decoration include wrapping the bottles in twine, ribbon, or fabric; applying decorative washi tape; or creating a dipped paint effect by partially submerging the bottles in paint. You can also use stencils and spray paint or chalkboard paint to create interesting patterns or to write messages on the bottles.
Which techniques work best for painting wine bottles?
Several techniques work best for painting wine bottles, such as using spray paint, acrylic paint, or chalkboard paint. When using spray paint, ensure that you cover the surface evenly and apply multiple light coats for a smooth finish. For acrylic paint, use a brush or sponge to apply the paint, and consider sealing with a clear coat for longevity. Chalkboard paint is great for creating a writable surface on the wine bottle, and it can be applied with a brush or a roller. Always clean and dry the bottles thoroughly before painting to ensure proper paint adhesion.